 MCP for Blender
Meshy is teaming up with MCP for Blender
Meshy is now available in MCP for Blender. Your AI can generate game-ready 3D meshes from text or concept art and place them straight into Blender. Meshy comes with Premium, so there's no account or API key to set up.
Meshy comes with Premium
If you have Premium, you already have Meshy. It runs on Meshy 7.1, Meshy's latest model, and each model counts as one standard generation, so it's on every plan. Plans start at $10 a month.
To turn it on:
- Update the addon with
uvx mcp-for-blender@latest update, then restart Blender and your MCP client. - Paste your license key in Edit → Preferences → Add-ons → MCP for Blender and click Activate. Meshy switches on in the current scene.
- Ask for a model. You can also provide a reference image for the prompt.
With Meshy, make a fairytale wizard and put it in the scene.
Get Meshy with Premium
Get access to the best 3D generation models like Meshy, Tripo and Hyper3D Rodin.
Using your own Meshy key
If you already pay for Meshy, you can use your API key instead. In Blender, press N, open the MCP for Blender tab, tick Meshy and paste your key. Meshy bills you directly, and the API needs a paid Meshy plan. The Meshy docs cover both setups.
Start with concept art
Meshy matches a design much more closely from an image than from a sentence, so make the concept art first. It's also cheaper to redo an image than a model, so settle the design at this stage.
Make one image per asset with any image model. Show the whole object on a plain white background under even light, because shadows in the picture get painted into the texture. Put the same style line at the end of every prompt so the set looks like it belongs to one game. For characters you'll rig later, ask for an A-pose.
A sci-fi hoverbike, three-quarter view, the whole object in frame, plain white background, even studio lighting. Gunmetal grey armor, worn safety-orange panels, small cyan light strips, a chunky silhouette.
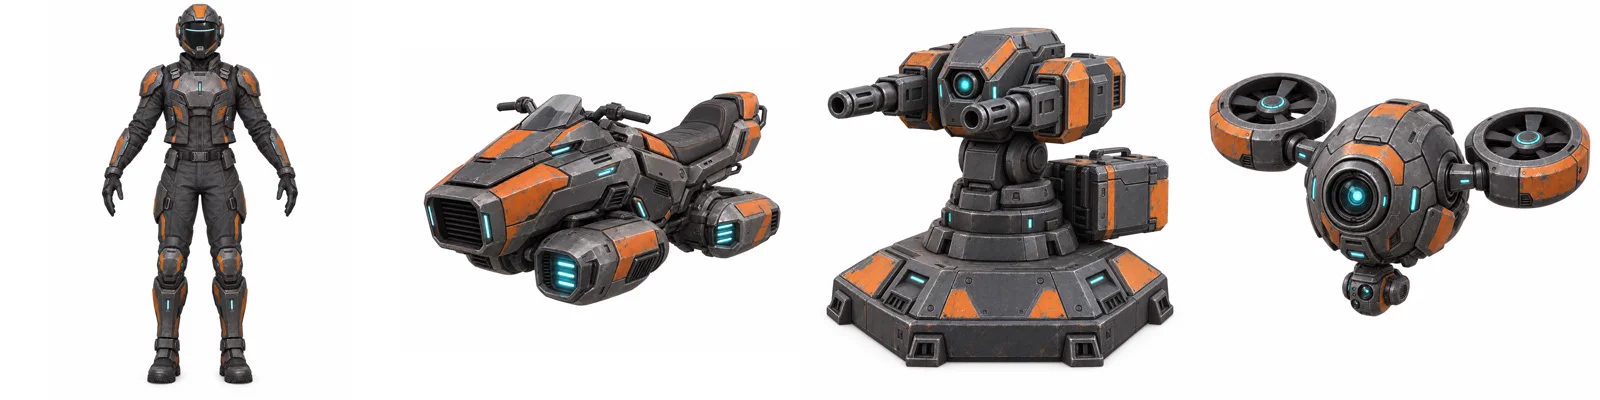
For a hero asset the camera will see from behind, make front, side and back views. Otherwise Meshy has to guess what the back looks like.
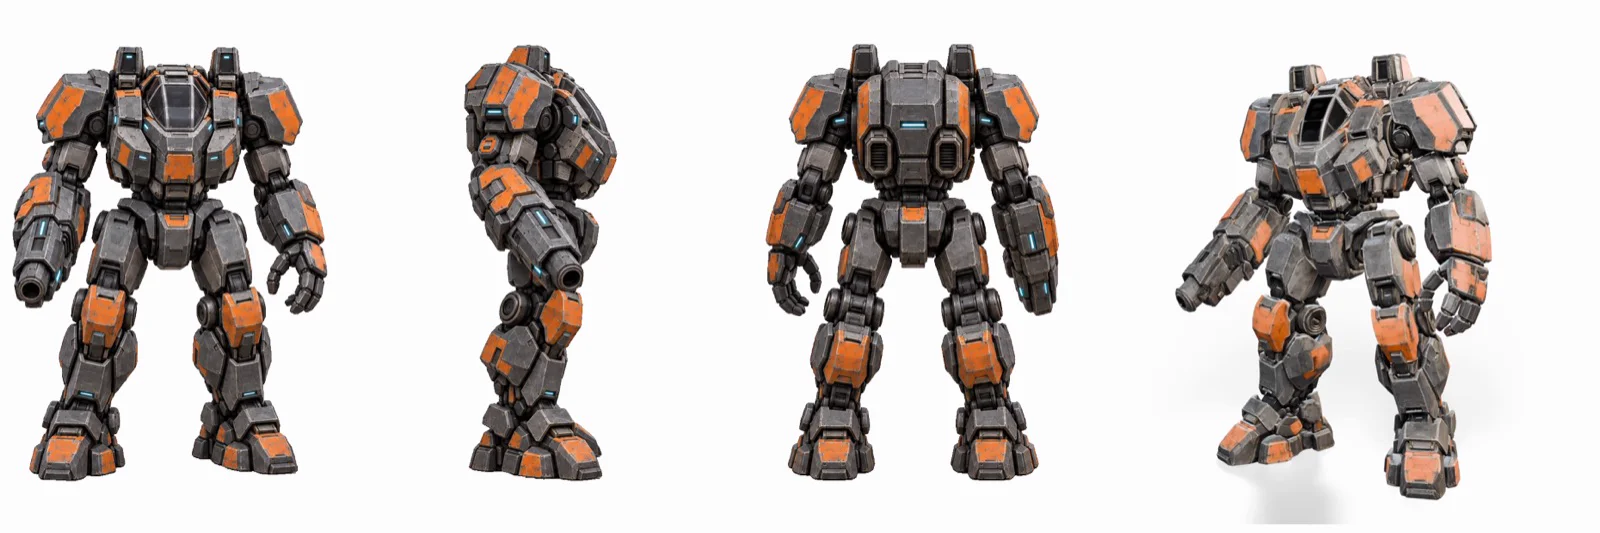
Generate the 3D models
Save the images to a folder and give your AI the path. Images pasted into the chat can't be passed to Blender. Meshy makes one object per call, so ask for models one at a time.
With Meshy, make a 3D model from each image in ./concept/, one at a time, then a knee-high sci-fi supply crate from text with the same gunmetal grey, safety-orange and cyan look. Put each beside the last so nothing overlaps, and keep their sizes.
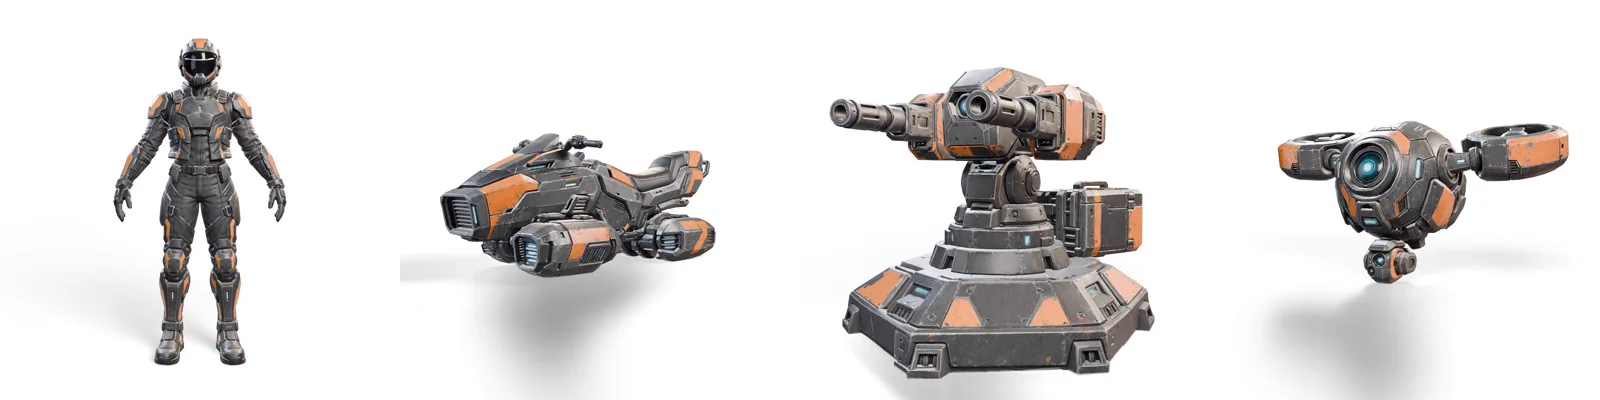
Models arrive at real-world size. Meshy estimates each model's height in metres and puts its origin at the bottom, so it lands standing on the floor at the right size for a game engine. If an asset's size matters, give the height in your prompt.
Build game worlds from your assets
Once you have the assets, ask the AI to arrange them. It reads the scene, places each model, then adds lights and a camera. It builds floors, walls and other simple shapes from Blender primitives, and can pull materials and HDRIs from Poly Haven.
Turn this into a sci-fi hangar: a metal grid floor, tall paneled walls, rows of strip lights down both sides and light haze. Put the mech in the middle, the pilot, turret and drone to its left, and the hoverbike and a stack of three crates to its right. Don't resize anything. Add a low camera looking up at the mech, then render a 1920x1080 image.
If the first render doesn't look right, describe what's wrong the way you would to an artist: the mech is too small in frame, the floor is too bright. Meshy's team got from a flat first render to the shot below with two notes like that.
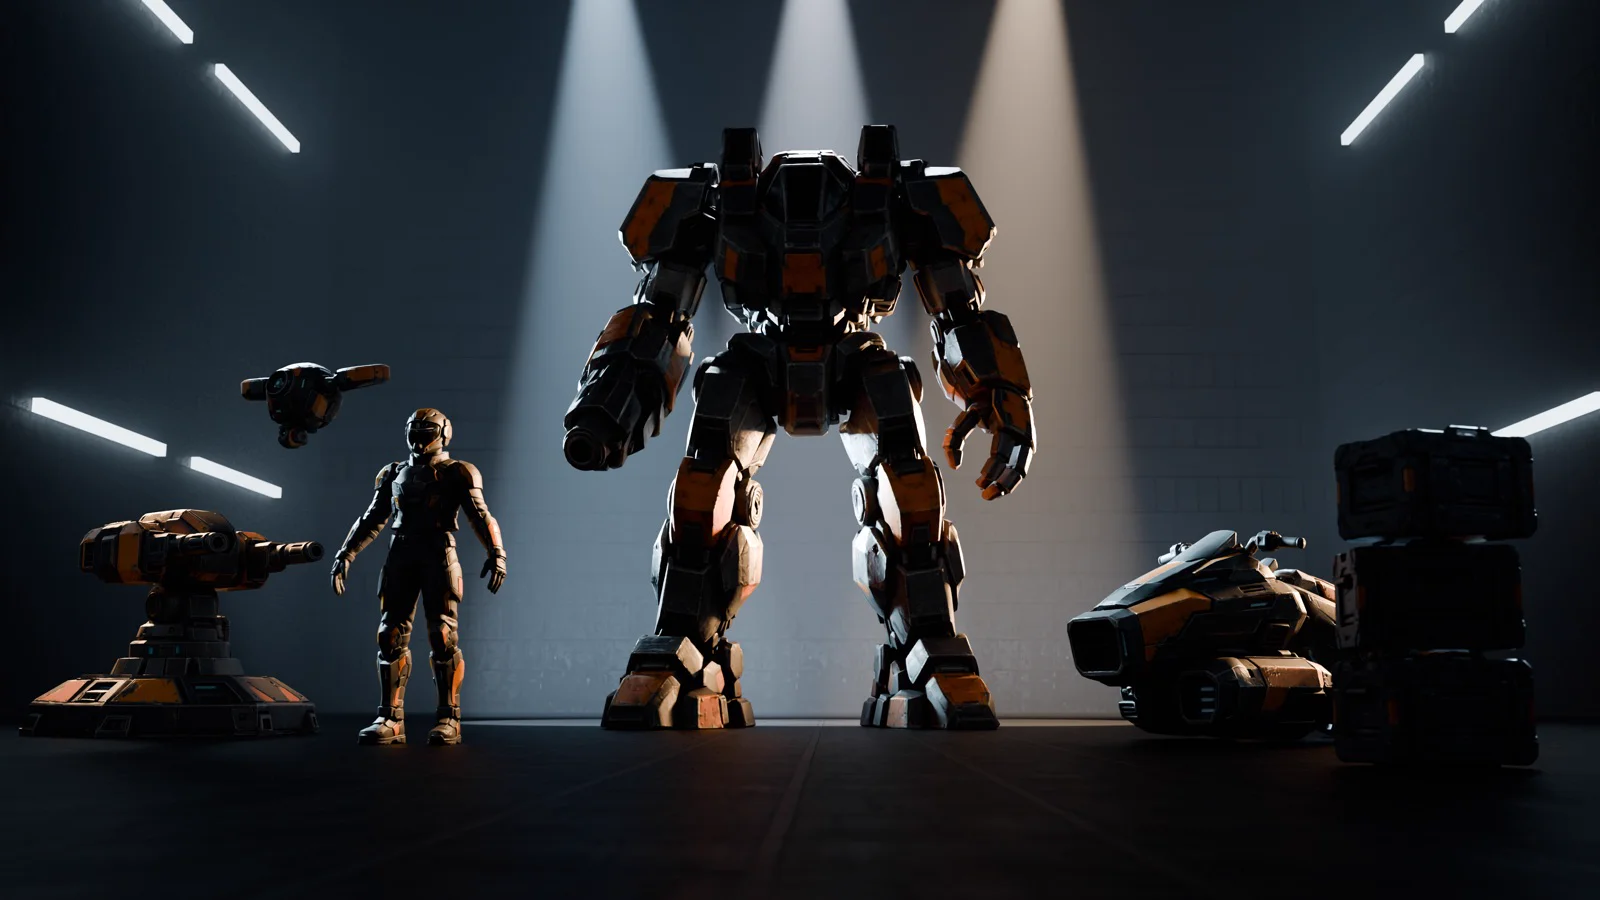
The gaming and scene generation docs have more prompts for building levels, including how to mix Meshy models with free assets from Poly Haven, Sketchfab and Poly Pizza.
The full walkthrough
Meshy wrote up the whole hangar build, with every prompt, credit costs and timings: How to Make Game Assets with MCP for Blender and Meshy. For setup and limits, see our Meshy docs.